In October 2014, we participated in a local “unusual” art show at Cotton Duck. The theme of the show was “Nightmare on Main Street”. Having been looking for an excuse to dive deeper into Unity VR development, we put on our game jam hats and brand-new Oculus Rift DK2s and got to learning. Hellicott City was conceived on October 1.
VR Horror
This was the first horror-themed project we’d ever attempted. Just thinking about horror in virtual reality is scary. The genre will be redefined and taken to new extremes, producing terrifyingly real experiences that scare us in ways that movies never can.
Sitting at the drawing board as a game developer, it seems too easy to scare a player in VR. Darkness, corpses, spiders, and ghosts. Spooky sounds and whisperers. Subliminal imagery. Helplessness and vulnerability. Perhaps some day we’ll visit that creative space, but for this project, with limited time and resources, and knowing the audience, we aimed for a more campy experience.
Old Ellicott City has a ton of local lore, ghost stories, characters, charm, trains, and long, winding, hilly roads through the woods. It was important to incorporate some of this into the game. We liked the idea of a virtual dark ride for the following reasons:
- It’s passive. This was going to be at most a 5-minute experience for first time VR users who probably do not play games. Learning a control scheme could be overwhelming and take away from immersion.
- It allows us to easily include more references to the town and control what is seen. Dark Ride inspirations include Disney’s Haunted Mansion, Pirates of the Caribbean, and Space Mountain.
- The rollercoaster parts give you a physical feeling like only virtual reality (and reality) can — hopefully more exhilarating than sickening. Learning how to avoid motion sickness in VR was one of our goals.
Week 1
First, we need a solution for putting a camera on a path. We looked for a Unity plugin with some specific features:
- Point-and-click editor tool for quickly and easily adding points to a path in the Scene view.
- Ability to quickly edit position and orientation of each point in the scene view.
- Different interpolation modes between points.
- Speed control.
- Place events on the path.
- Buttery smooth animation. No unexpected subtle movements.
- Does not significantly drop framerate.
We went with Camera Path Animiator on the Unity Asset Store. It was easy to pick up and start using right away. Although satisfied with this choice for camera movement, something that would later prove to be difficult was making sure that the camera path was even with the roads. Next time, we’ll look for a better solution for combining a track and moving camera.
With a solution for the rollercoaster part of the experience, the next thing to think about was the environment. We actually started out with the intent of doing a photorealistic, accurate remodeling of the town and terrain. We tried gathering elevation data and turning that data into a Unity terrain. It sounded like a good idea, but in practice the elevation data was not high enough resolution (30m) to provide an accurate representation of what a person would see at eye-level. Thus, it wasn’t saving any time to start with an imported terrain, since it would have to be sculpted and scaled by hand anyway. Unity’s terrain editing tools got the job done, using Google Maps and memory as a guide.
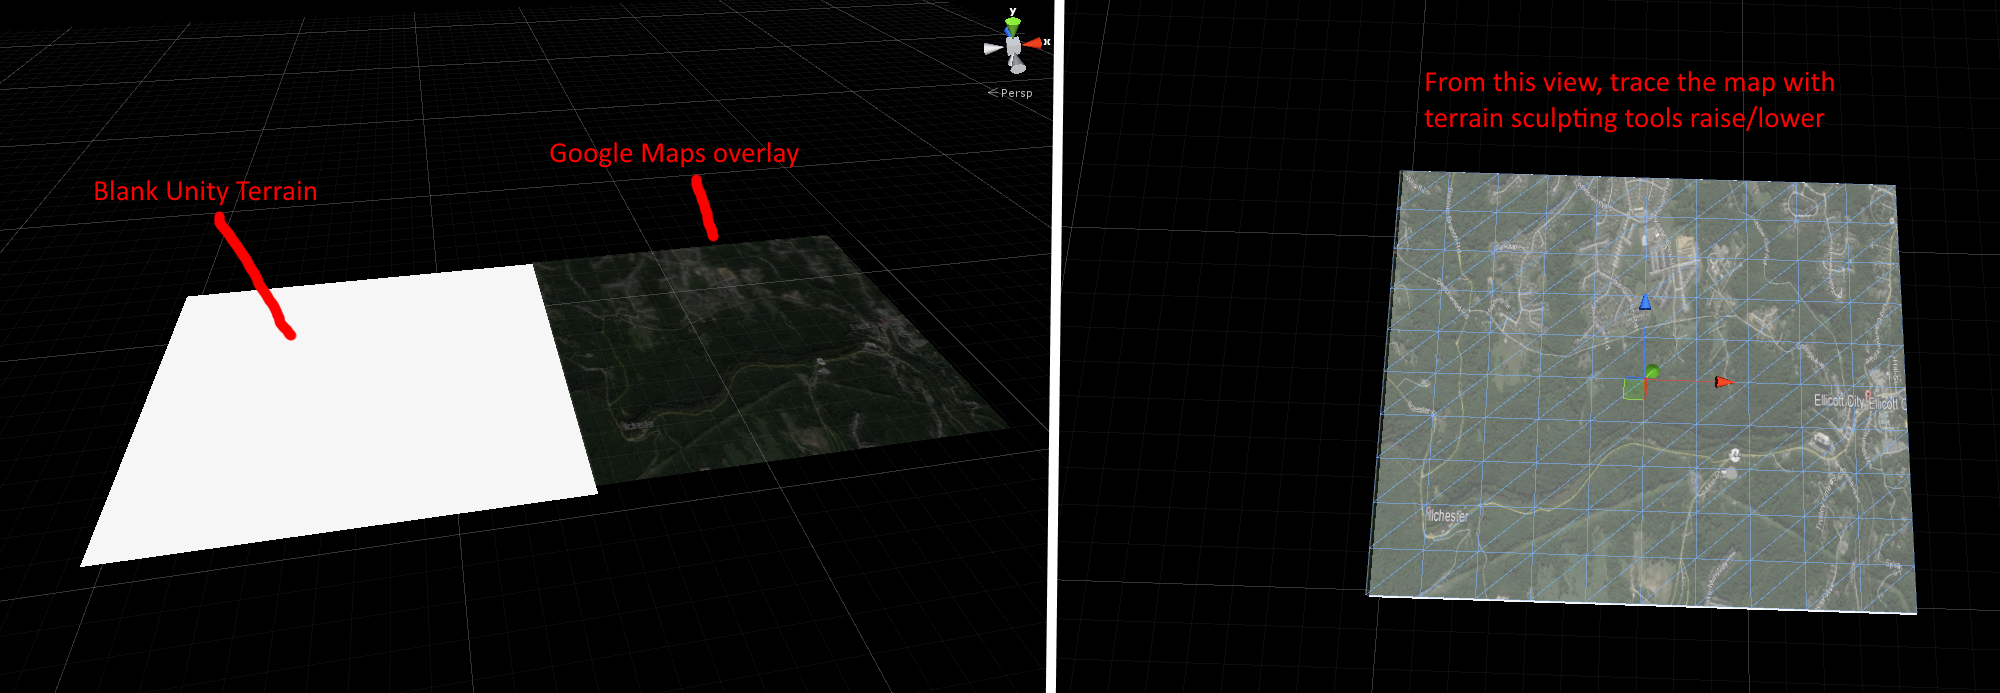
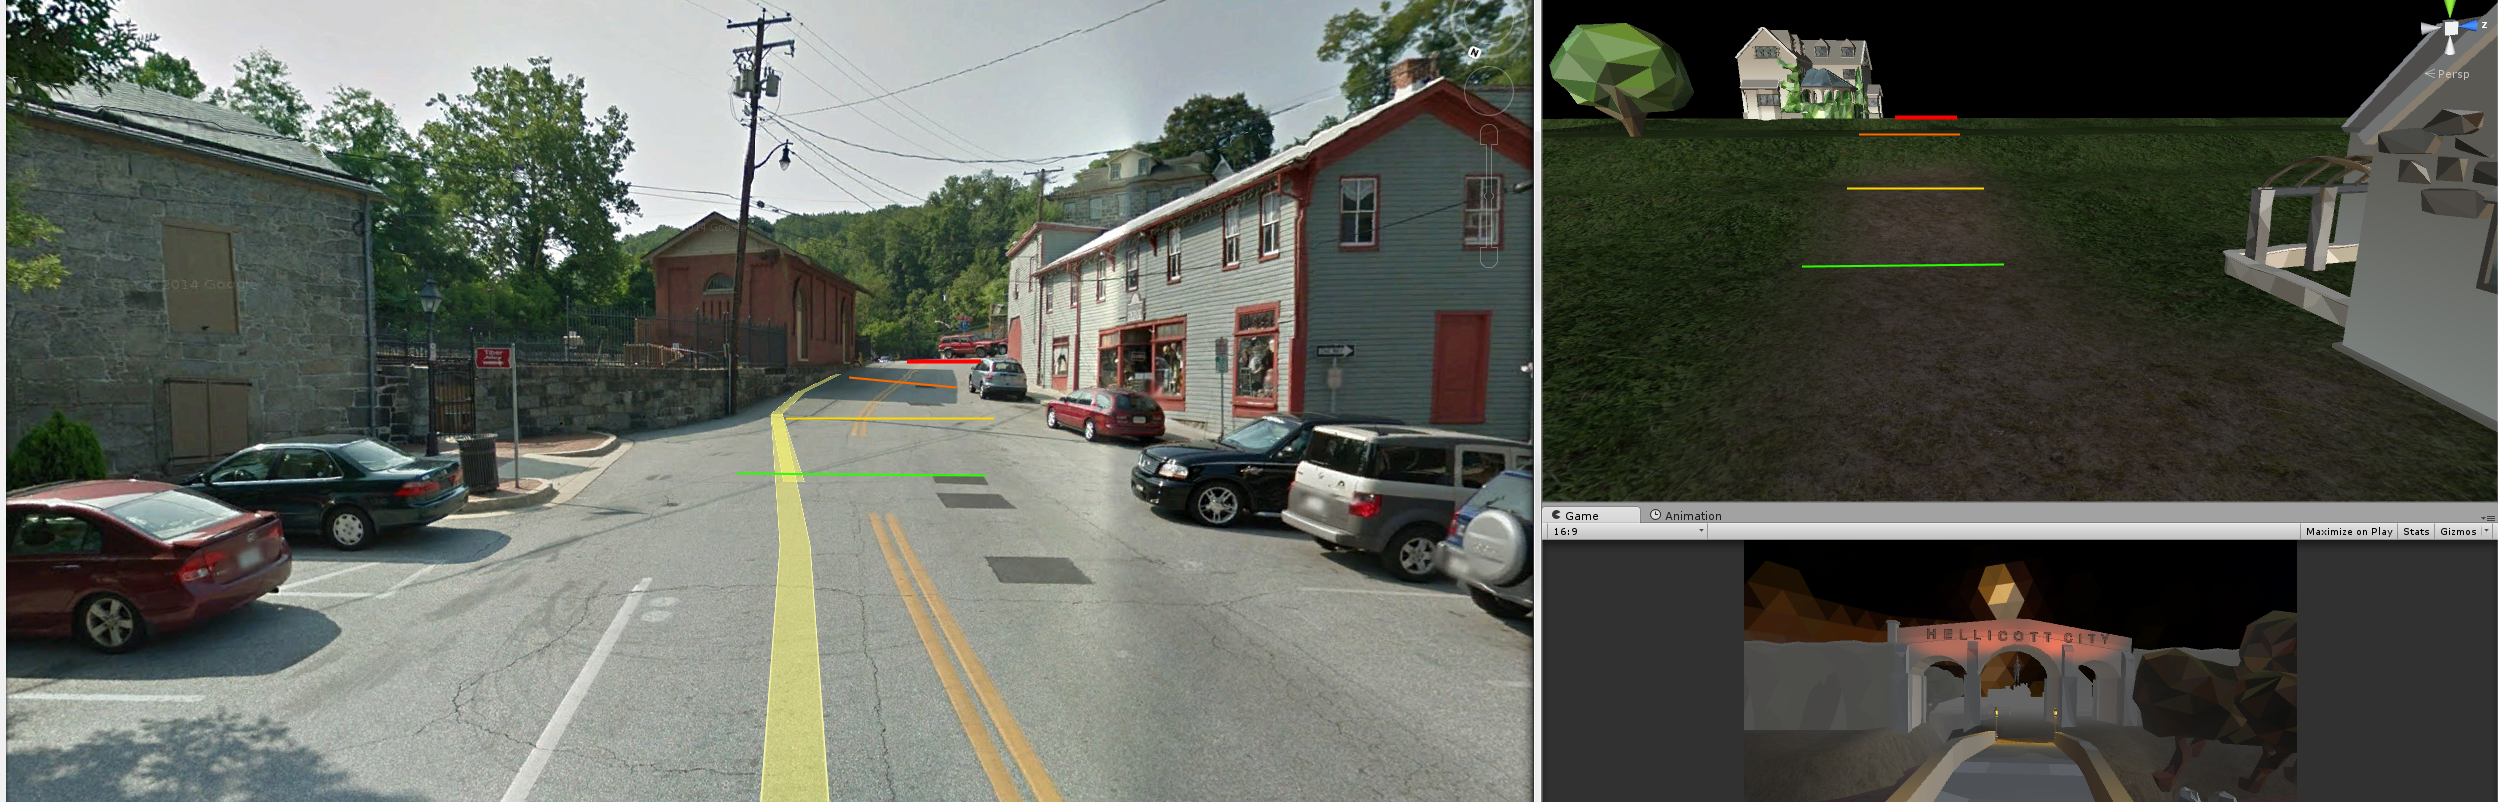
Using Street View as a reference, we aligned the Unity scene camera with the Google Street View camera, took a screenshot, drew some elevation lines, and sculpted/smoothed the terrain to fit.
Sculpting a path, painting, and placing trees on the landscape would continue almost constantly over the course of the month while other ideas evolved.
At one point during the week, the camera started rendering onto the terrain. This was a mistake.
Week 2
We grabbed a bunch of free or cheap assets from the Unity Asset Store and began populating the town. Props like a hanging man, a person digging, gravestones, etc. We weren’t sure how they were going to fit in. There definitely needed to be a train. “Should I buy the guillotine?”
Bringing in all these assets from different sources, there were concerns scaling everything to the “right” size. Once we had a wagon and a rider, we used those models as a reference for scaling the buildings and environment. We would like more precise scaling method next time because it’s important in virtual reality.
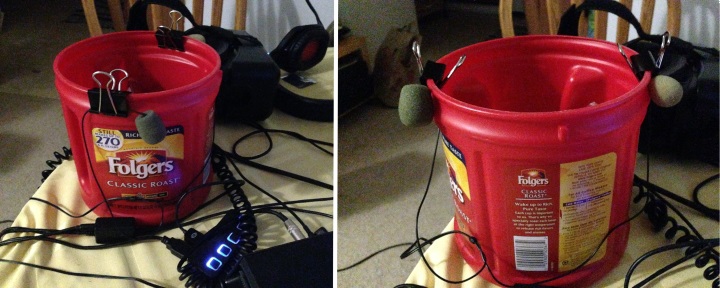
How about audio? We found some sound effects and music on freesound.org and nosoapradio.us. We definitely wanted get some experience with spatialized sound. Rather than immediately trying a plugin, we sidetracked and attempted to make our own sound effects. This was probably a waste of project hours, but the goals were to tackle many aspects of VR development in order to learn, and rigging up a shoddy binaural microphone to see if it would “work” was just something we had to try. We found some old gaming headsets and earbuds, and began surgery — snipping the earbuds off and resoldering the wires to microphones. Plugging the contraption into an audio-in jack successfully records into the right and left channels. The problem was that the microphones were meant for headsets and do not pick up any meaningful sounds unless the audio source is very close to the mic. It was a fun experiment, but not useful for this project.
By the end of Week 2, we had a rough draft. A tour through the main street, continuing up into the woods for a drive through the hills. It was close enough to looking like Main Street that anyone who has been there would recognize it. We demoed to some friends at this point and got feedback. Here’s what it looked like on October 16:
Week 3
Performance is king. If this ride makes people sick due to lag and jittery tracking, we’ve failed at VR. A real challenge was that the game would be demoed on a laptop with a GTX 560m graphics card — far from a “VR Ready” rig. Focus moved to getting the experience to run at 75 FPS — the refresh rate of the DK2 display. We weren’t much above 40 FPS most of the time. Lightmapping was crucial — real-time shadows were out of the question if we were to maintain 75 FPS. We reduced visual quality and added garbage collection events. The ride is linear, so we destroy anything that will never be seen again. We load objects just before the come into view. The fog was a convenient way to limit visibility and therefore limit the number of objects on the screen.
Occlusion culling provided the biggest gain. The profiler was essential for finding memory hogs in the scene. At times, we hit 75 FPS. Some events and areas, depending where the person looks, brought it down to around 60. More complex scenery dragged it down further. Managing performance of each area was a process that lasted the duration of the project. We ultimately didn’t end up making all the optimizations we wanted to make (combining meshes and batching textures, for example). During testing, it wasn’t making people sick or uncomfortable, so we were satisfied that if it did not see a drastic decrease in performance over the next week, it would be OK for the show.
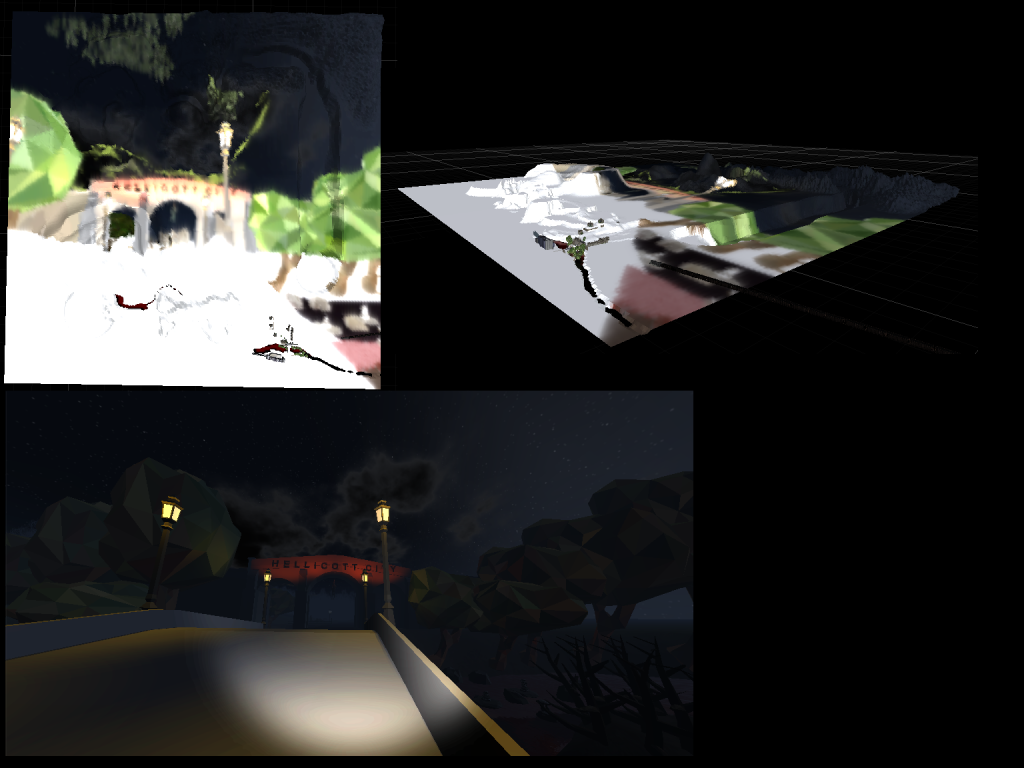
At some point during week 3, the second half of the ride started to come together — leaving the recognizable historic district and embarking on a dark ride through the woods. A cemetary. A haunted mansion. Hills. A tunnel. Something scary at the end.
We learned that most people can handle movement in VR if it is a constant velocity. Acceleration is likely to induce motion sickeness — avoid it.
Week 4
Adding rain and accompanying sound effects really added a lot to the experience at a performance cost that was worth the trade. The week was full of constant editing, tweaking, positioning, and making sure we had a “complete” ride. We revisited binaural audio with the 3Dception Unity plugin. Can you hear it? It was easy to add to the project and definitely enhanced some sound effects. It didn’t incur much of a performance hit either.
Here’s a video of the ride on Halloween.
Conclusion
The response at the show was positive. People enjoyed the ride and were generally excited about VR.
Here are some things that went well:
- Almost no motion sickness complaints (one person removed the headset right away, feeling dizzy).
- Learned a lot by diving into a Unity VR project.
- Gained experience with 3d sound, performance optimizations, virtual world design, and more. To summarize some important findings:
– Always keep an eye on performance to make sure your game’s framerate does not drop under the refresh rate of the display. Use lightmapping, occlusion culling, and batching.
– Use as much anti-aliasing as you can afford without performance suffering.
– Avoid acceleration, but constant velocity movement is OK.
Here are some things that we’d do differently:
- Better cart animation and smoother ride. The wheels aren’t always even with the ground and that is an obvious immersion breaker.
- More optimizations to reach consistent 75 FPS. Batching textures and combining meshes. The roads ended up taking up a lot of memory and need to be broken up into smaller pieces.
- More content/spooky stuff.
- Make a clearer end-goal to work towards from the beginning. With the freedom to do anything, and a lot of ideas, it was difficult to narrow focus. Time was wasted on things that were left out of the final build.
- Model the actual buildings rather than use stock assets.
Some videos of people playing the game: